Colab is one of the best products to come from Google. It has made GPUs freely accessible to learners and practitioners like me who otherwise wouldn’t be able to afford a high-end GPU.
While the interface is very easy to use, there are many lesser-known and undocumented features in colab. In this post, I will share those features that I’ve discovered from basic usage and their official talks.
1. Scratchpad Notebook
It’s a pretty common scenario that we have a bunch of cluttered untitled notebooks created when we try out temporary stuff on colab.
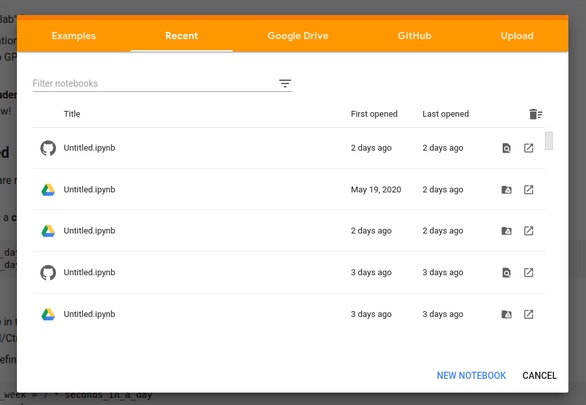
To solve this, you can bookmark the link given below. It will open a special scratch notebook and any changes you make to that notebook are not saved to your main account.
2. Timing Execution of Cell
It’s pretty common that we manually calculate the difference between start and end times of a piece of code to gauge the time taken.
Colab provides an inbuilt feature to do this. After a cell is executed, just hover over the cell run icon and you will get an estimate of the execution time taken.

3. Run part of a cell
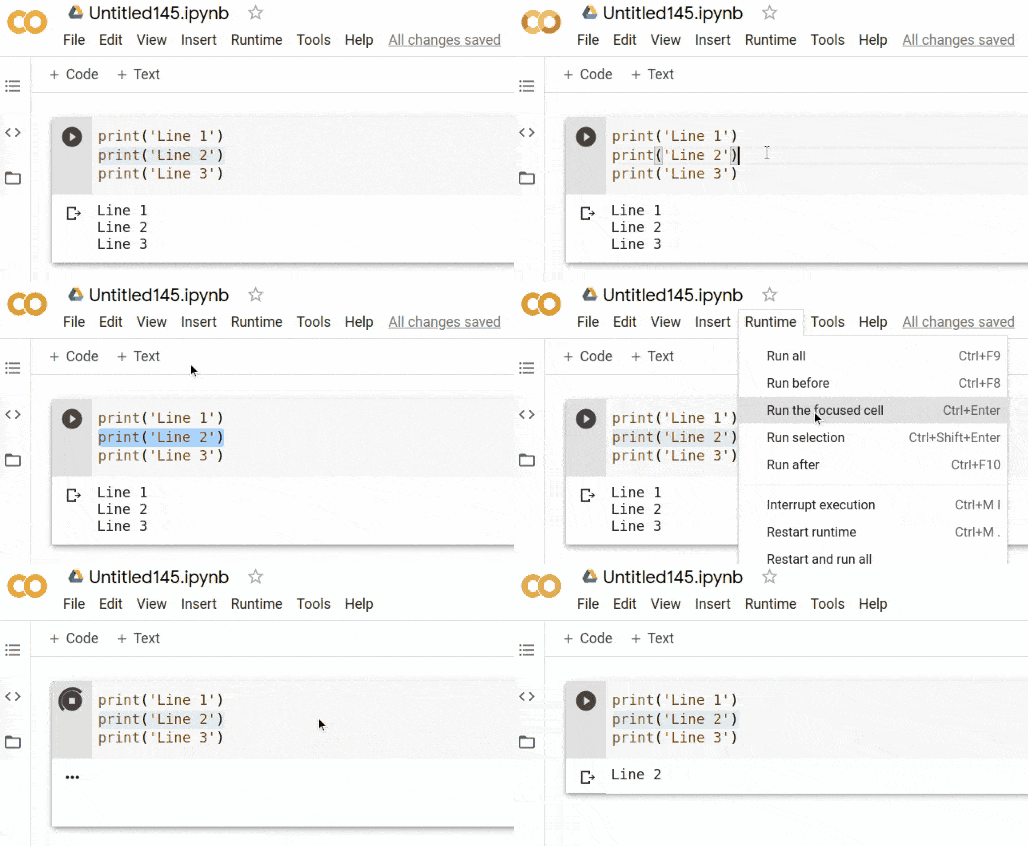
You can also run only a part of the cell by selecting it and pressing the Runtime > Run Selection button or using the keyboard shortcut Ctrl + Shift + Enter.
4. Jupyter Notebook Keyboard Shortcuts
If you are familiar with keyboard shortcuts from Jupyter Notebook, they don’t work directly in Colab. But I found a mental model to map between them.
Just add Ctrl + M before whatever keyboard shortcut you were using in Jupyter. This rule of thumb works for the majority of common use-cases.
| Action | Jupyter Notebook | Google Colab |
|---|---|---|
| Add a cell above | A | Ctrl + M + A |
| Add a cell below | B | Ctrl + M + B |
| See all keyboard shorcuts | H | Ctrl + M + H |
| Change cell to code | Y | Ctrl + M + Y |
| Change cell to markdown | M | Ctrl + M + M |
| Interrupt the kernel | II | Ctrl + M + I |
| Delete a cell | DD | Ctrl + M + D |
| Checkpoint notebook | Ctrl + S | Ctrl + M + S |
Below are some notable exceptions to this rule for which either the shortcut is changed completely or kept the same.
| Action | Jupyter Notebook | Google Colab |
|---|---|---|
| Restart runtime | 00 | Ctrl + M + . |
| Run cell | Ctrl + Enter | Ctrl + Enter |
| Run cell and add new cell below | Alt + Enter | Alt + Enter |
| Run cell and goto the next cell below | Shift + Enter | Shift + Enter |
| Comment current line | Ctrl + / | Ctrl + / |
5. Jump to Class Definition
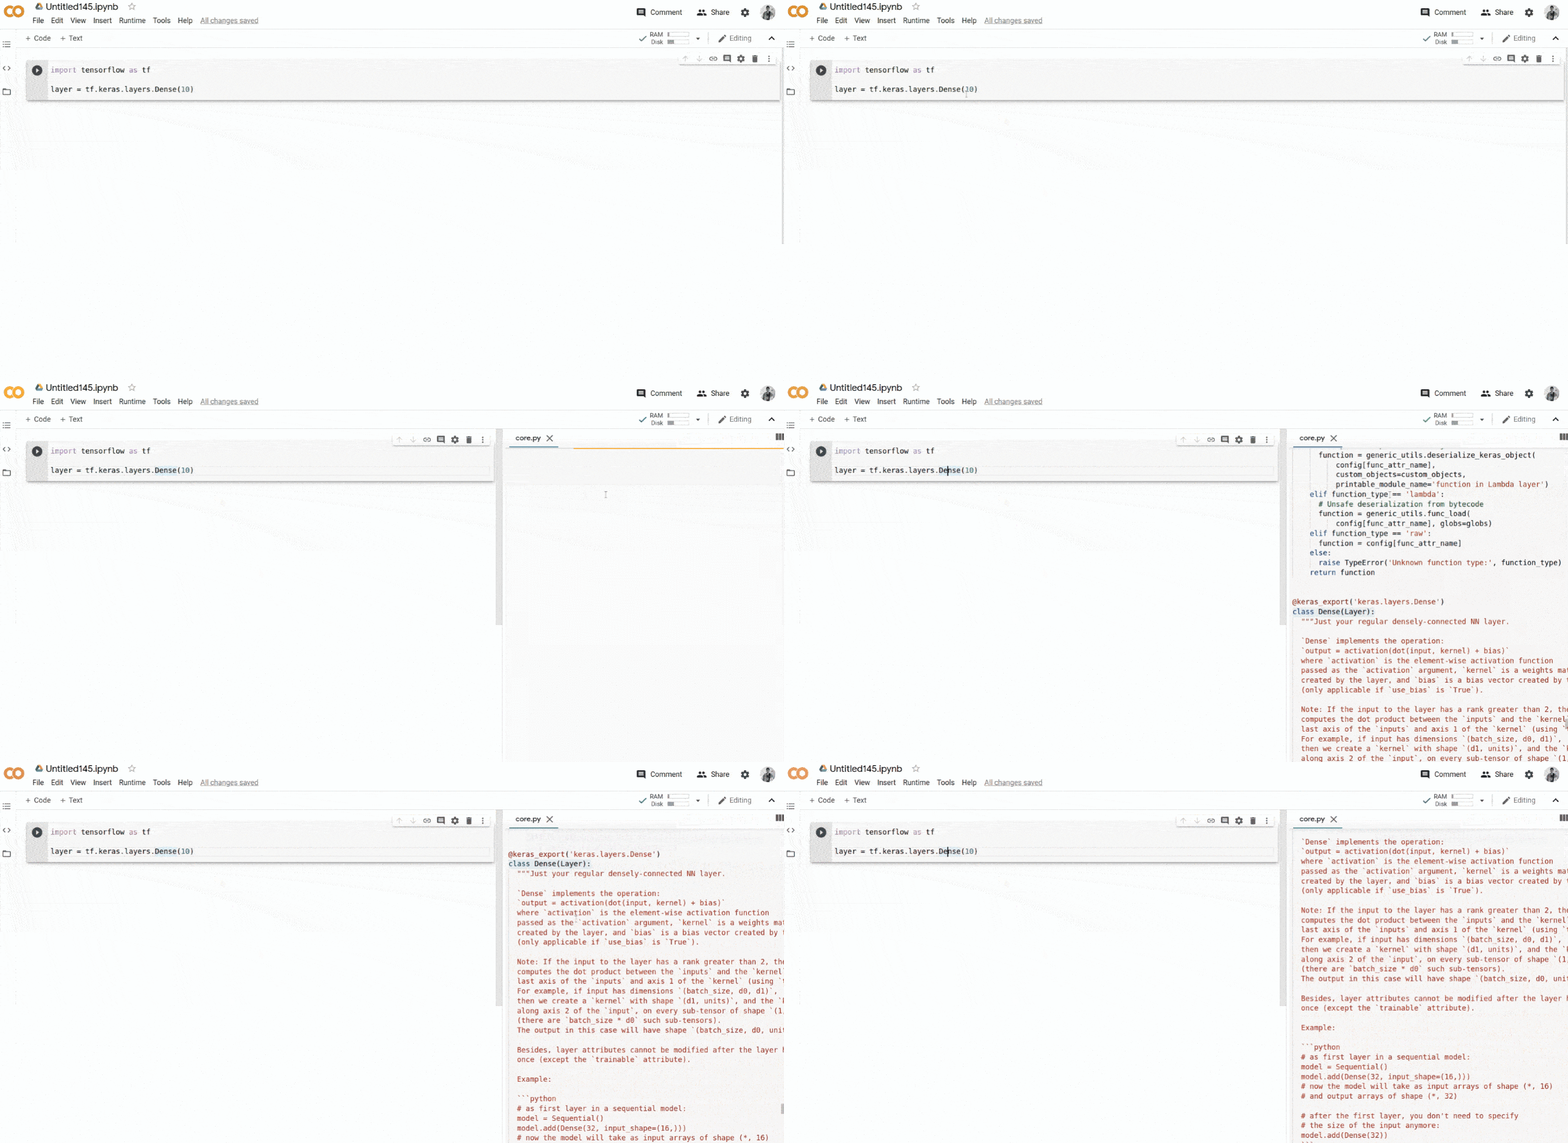
Similar to an IDE, you can go to a class definition by pressing Ctrl and then clicking a class name. For example, here we view the class definition of the Dense layer in Keras by pressing Ctrl and then clicking the Dense class name.
6. Open Notebooks from GitHub
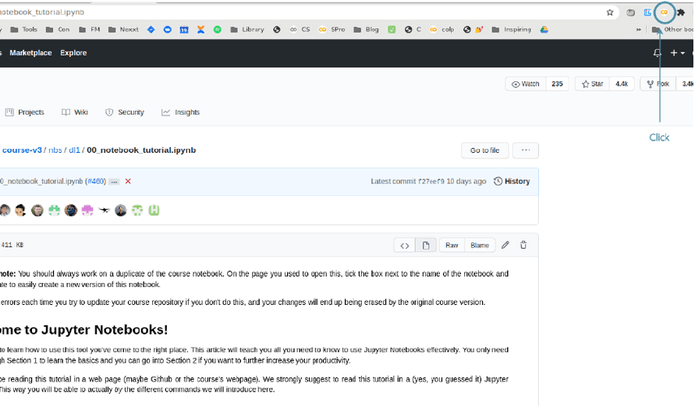
The Google Colab team provides an official chrome extension to open notebooks on GitHub directly on colab. You can install it from here.
After installation, click the colab icon on any GitHub notebook to open it directly.
Alternatively, you can also manually open any GitHub notebook by replacing github.com with colab.research.google.com/github.
https://github.com/fastai/course-v3/blob/master/nbs/dl1/00_notebook_tutorial.ipynb
to
https://colab.research.google.com/github/fastai/course-v3/blob/master/nbs/dl1/00_notebook_tutorial.ipynb
An even easier way is to replace github.com with githubtocolab.com. It will redirect you to a colab notebook.
https://github.com/fastai/course-v3/blob/master/nbs/dl1/00_notebook_tutorial.ipynb
to
https://githubtocolab.com/fastai/course-v3/blob/master/nbs/dl1/00_notebook_tutorial.ipynb
7. Run Flask apps from Colab
With a library called flask-ngrok, you can easily expose a Flask web app running on colab to demo prototypes. First, you need to install flask and flask-ngrok.
!pip install flask-ngrok flask==0.12.2Then, you just need to pass your flask app object to run_with_ngrok function and it will expose a ngrok endpoint when the server is started.
from flask import Flask
from flask_ngrok import run_with_ngrok

app = Flask(__name__)
run_with_ngrok(app)

@app.route('/')
def hello():
    return 'Hello World!'

if __name__ == '__main__':
    app.run()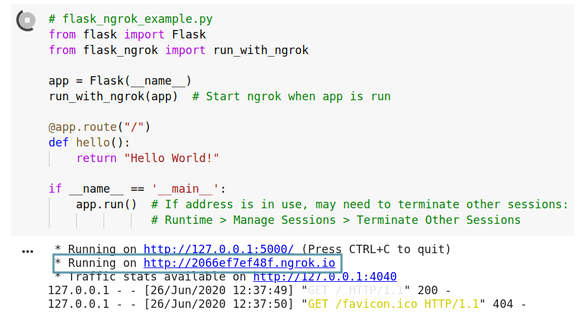
You can try this out from the package author’s official example on Colab.
8. Switch between Tensorflow versions
You can easily switch between Tensorflow 1 and Tensorflow 2 using this magic flag.
To switch to Tensorflow 1.15.2, use this command:
%tensorflow_version 1.xTo switch to Tensorflow 2.2, run this command:
%tensorflow_version 2.xYou will need to restart the runtime for the effect to take place. Colab recommends using the pre-installed Tensorflow version instead of installing it from pip for performance reasons.
9. Tensorboard Integration
Colab also provides a magic command to use Tensorboard directly from the notebook. You just need to set the logs directory location using the --logdir flag. You can learn to use it from the official notebook.
%load_ext tensorboard
%tensorboard --logdir logs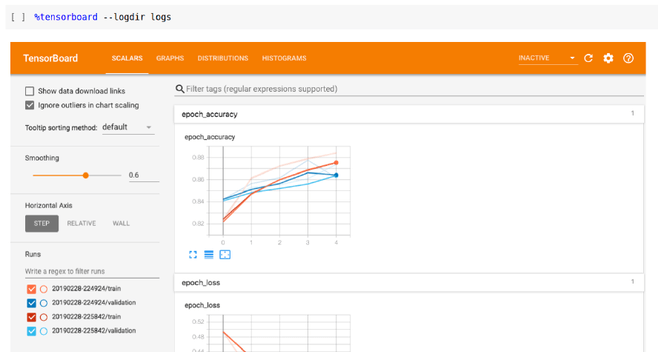
10. Gauge resource limits
Colab provides the following specs for their free and pro versions. Based on your use case, you can switch to the pro version at $10/month if you need a better runtime, GPU, and memory.
| Version | GPU | GPU Ram | RAM | Storage | CPU Cores | Idle Timeout | Maximum Runtime |
|---|---|---|---|---|---|---|---|
| Free | Tesla K80 | 11.44GB | 13.7GB | 37GB | 2 | 90 min | 12 hrs |
| Pro | Tesla P100 | 16GB | 27.4GB | 37GB | 4 | 90 min | 24 hrs |
You can view the GPU you have been assigned by running the following command
!nvidia-smiFor information on the CPU, you can run this command
!cat /proc/cpuinfoSimilarly, you can view the RAM capacity by running
import psutil
ram_gb = psutil.virtual_memory().total / 1e9
print(ram_gb)
11. Use interactive shell
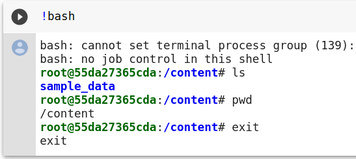
There is no built-in interactive terminal in Colab. But you can use the bash command to try out shell commands interactively. Just run this command and you will get an interactive input.
!bashNow, you can run any shell command in the given input box.

To quit from the shell, just type exit in the input box.
12. Current memory and storage usage
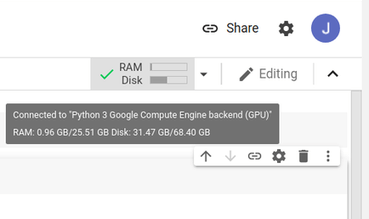
Colab provides an indicator of RAM and disk usage. If you hover over the indicator, you will get a popup with the current usage and the total capacity.
13. “Open in Colab” Badge
You can add a ‘Open in Colab’ badge to your README.md or jupyter notebooks using the following markdown code.
In the markdown code, we’re loading an SVG image and then linking it to a colab notebook.
[](https://colab.research.google.com/notebooks/basic_features_overview.ipynb)14. Interactive Tables for Pandas
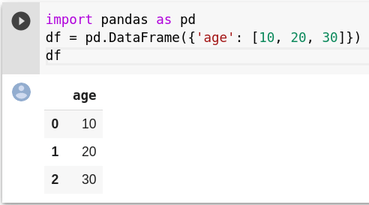
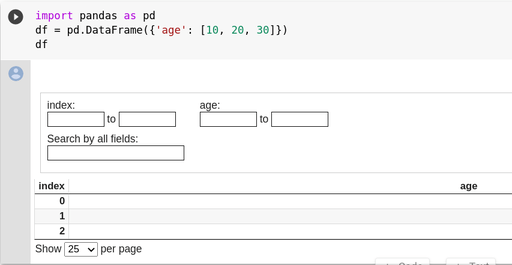
Colab provides a notebook extension to add interactive sorting and filtering capabilities to pandas dataframes. To use it, run the following code.
%load_ext google.colab.data_tableYou can see the regular pandas dataframe and the interactive dataframe after loading the extension below.
15. Setup Conda environment
If you use miniconda as your python environment manager, you can setup it on colab by running these commands at the top of your notebook.
# Download Miniconda installation script
!wget https://repo.anaconda.com/miniconda/Miniconda3-latest-Linux-x86_64.sh

# Make it executable
!chmod +x Miniconda3-latest-Linux-x86_64.sh

# Start installation in silent mode
!bash ./Miniconda3-latest-Linux-x86_64.sh -b -f -p /usr/local

# Make conda packages available in current environment
import sys
sys.path.append('/usr/local/lib/python3.7/site-packages/')
After the cell is executed, you can use conda to install packages as usual.
!conda install -y flaskAlternatively, you can use condacolab package to install it easily.
pip install condacolabThen, run these python commands to install miniconda.
import condacolab
condacolab.install_miniconda()
16. Manage Colab Notebooks from Command Line
You can use a library called colab-cli to easily create and sync colab notebooks with your local notebooks.
17. Run background tasks
There are use-cases when we need to start some web server or background tasks before we can execute our regular program.
To run background tasks, use the nohup command followed by your regular shell command and add & to the end to run it in the background. This makes sure that you can run cells afterward in the notebook without your background task blocking it.
!nohup bash ping.sh &18. Notify on Training Completion
If you’re running a long task such as training a model, you can setup Colab to send a desktop notification once it’s completed.
To enable that, goto Tools ⮕ Settings ⮕ Site and enable Show desktop notifications checkbox.
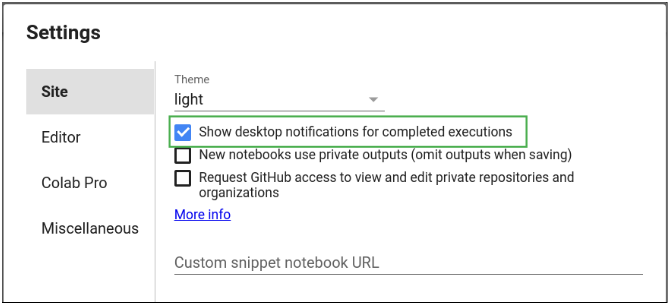
You will get a popup to enable browser notification. Just accept it and colab will notify you on task completion even if you are on another tab, window or application.
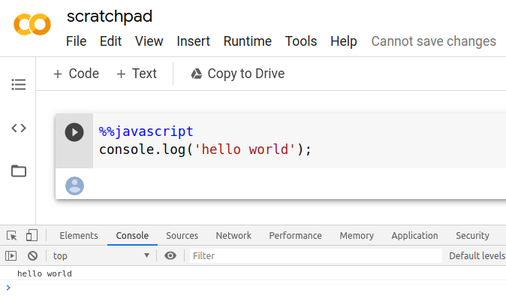
19. Run javascript code
You can run javascript code by using the %%javascript magic command.
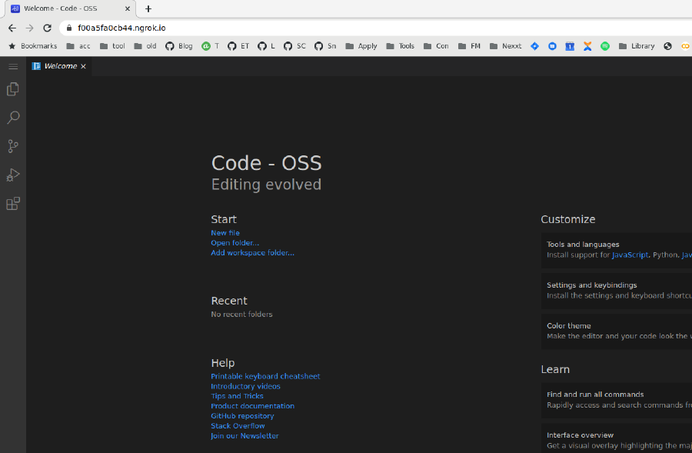
20. Run VSCode on Colab
You can run a full-fledged VSCode editor on Colab by following the method I have explained in another article.
21. Custom snippets
You can save your own collections of useful snippets and access them easily in any colab notebook.
Create a colab notebook called
snippets.ipynb. To add each of your snippets, create a markdown cell and add name of the snippet as header. Below, the markdown cell, add a code cell with the snippet code.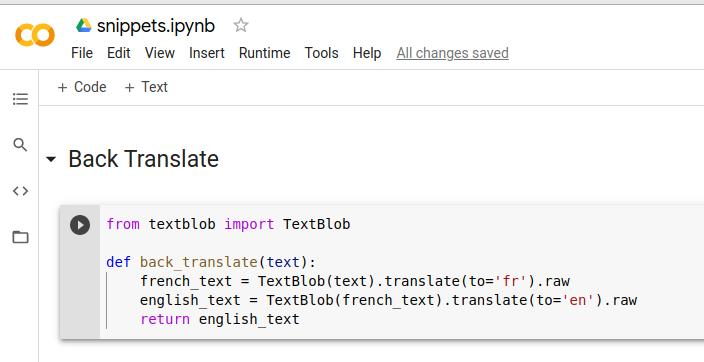
Copy the link of this notebook from the browser tab.
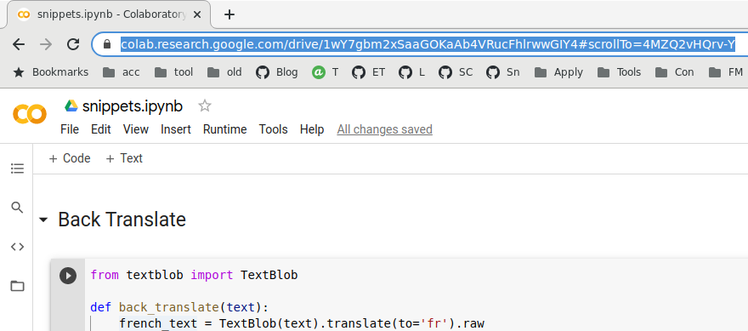
Click
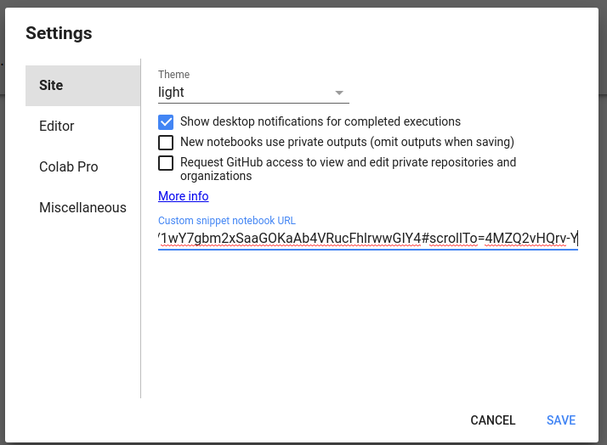
Tools > Settingsin your menu bar to open preference of colab.
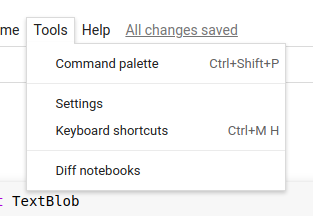
Paste the link into the
Custom snippet notebook URLtextbox and click save.
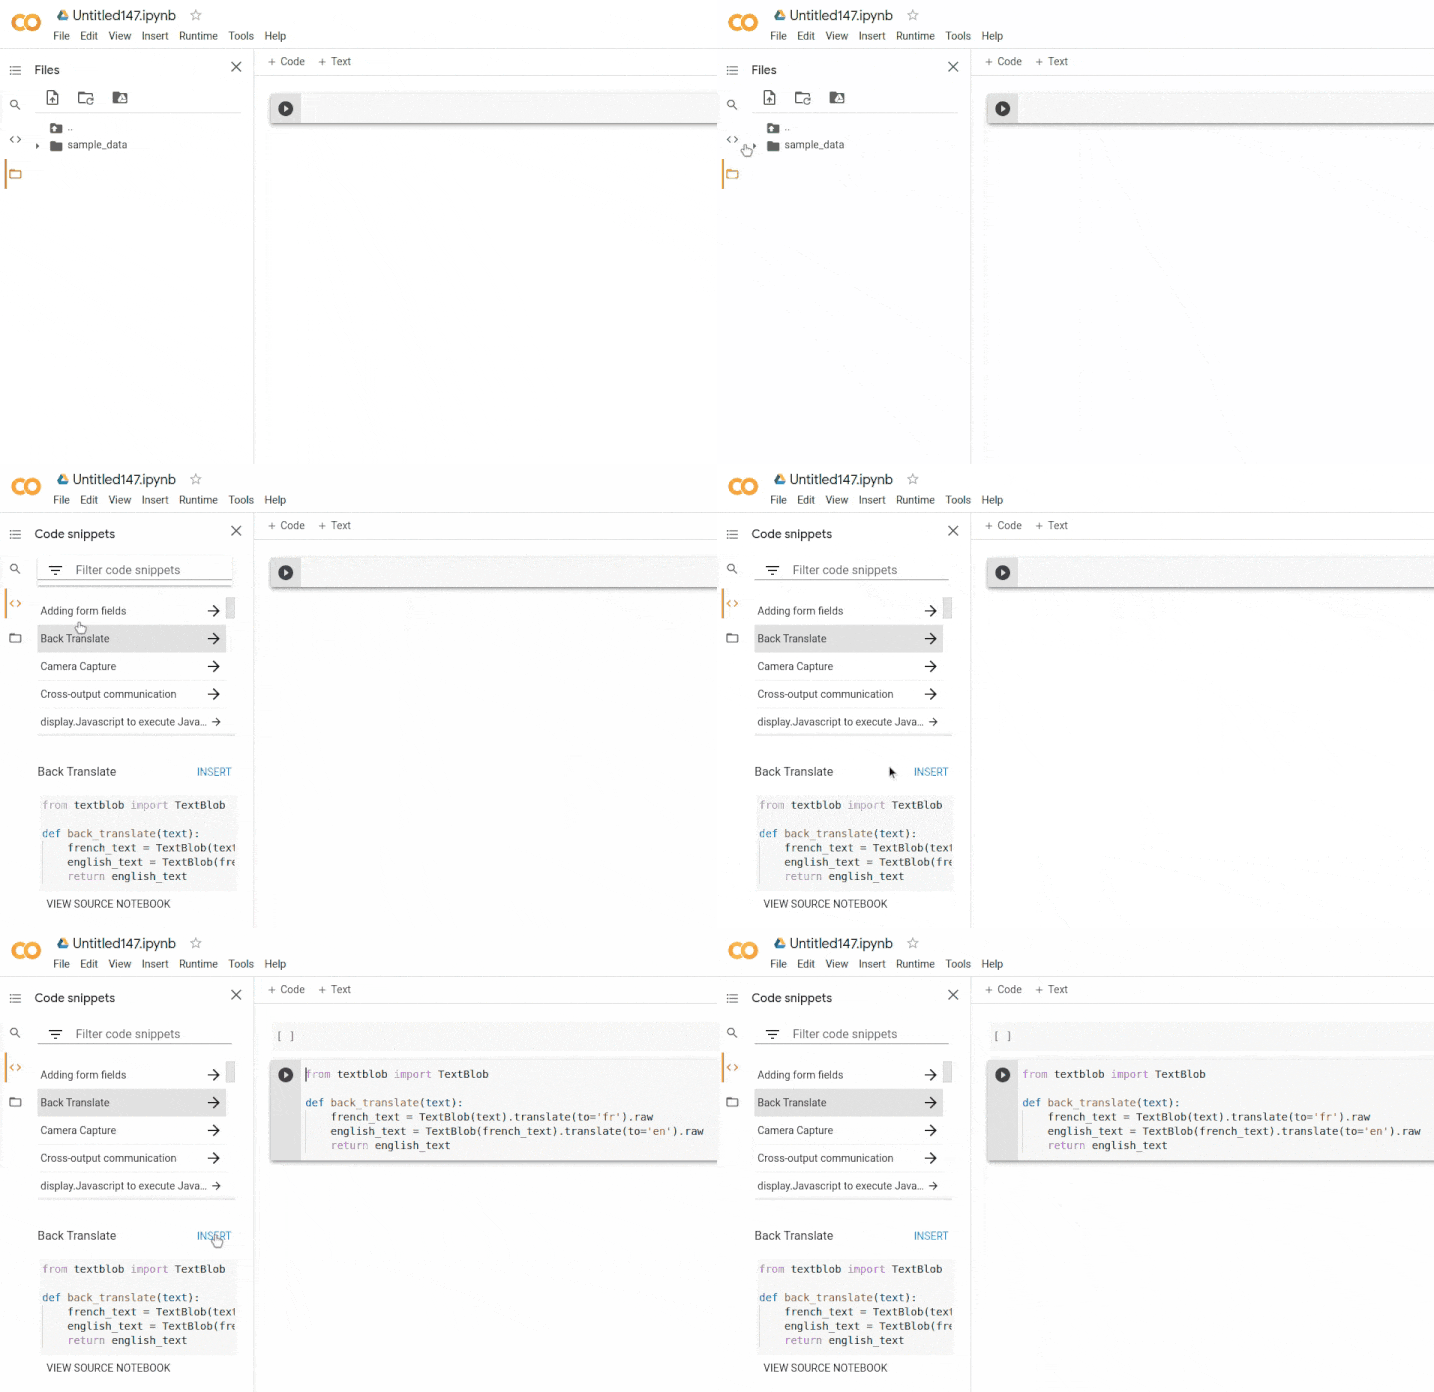
- Now, the snippets are available in any colab notebook you use. Just click the <> icon on sidebar, search for your snippet name and click Insert. The code will be inserted into a new cell.
22. Run JupyterLab on Google Colab
You can start a JupyterLab instance on colab by running the following commands in a cell.
!pip install jupyterlab pyngrok -q

# Run jupyterlab in the background
!nohup jupyter lab --ip=0.0.0.0 &

# Get ngrok URL mapped to port 8888
from pyngrok import ngrok
print(ngrok.connect(8888))
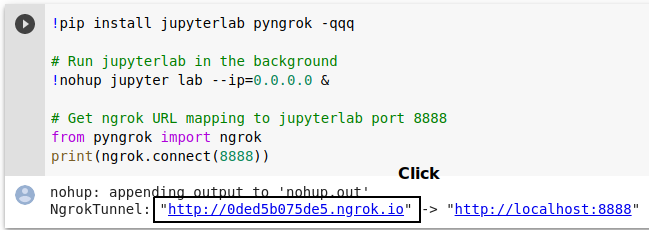
Once executed, click the printed ngrok URL to access the JupyterLab interface.
23. Run R programs in Google Colab
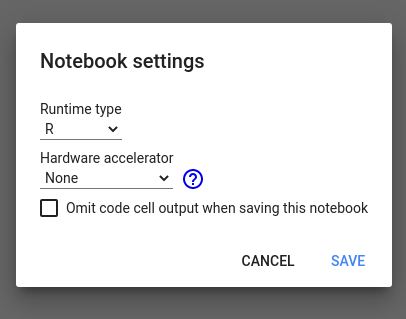
You can use R programming language in Google Colab by going to https://colab.research.google.com/notebook#create=true&language=r. It will open a new notebook with R set as the kernel instead of Python.
References
- Timothy Novikoff, “Making the most of Colab (TF Dev Summit ’20)”
- Gal Oshri, “What’s new in TensorBoard (TF Dev Summit ’19)”